80d canon manual
The Canon EOS 80D is a high-performance DSLR camera featuring a 24.2MP APS-C CMOS sensor and DIGIC 6 processor, designed for exceptional image quality.
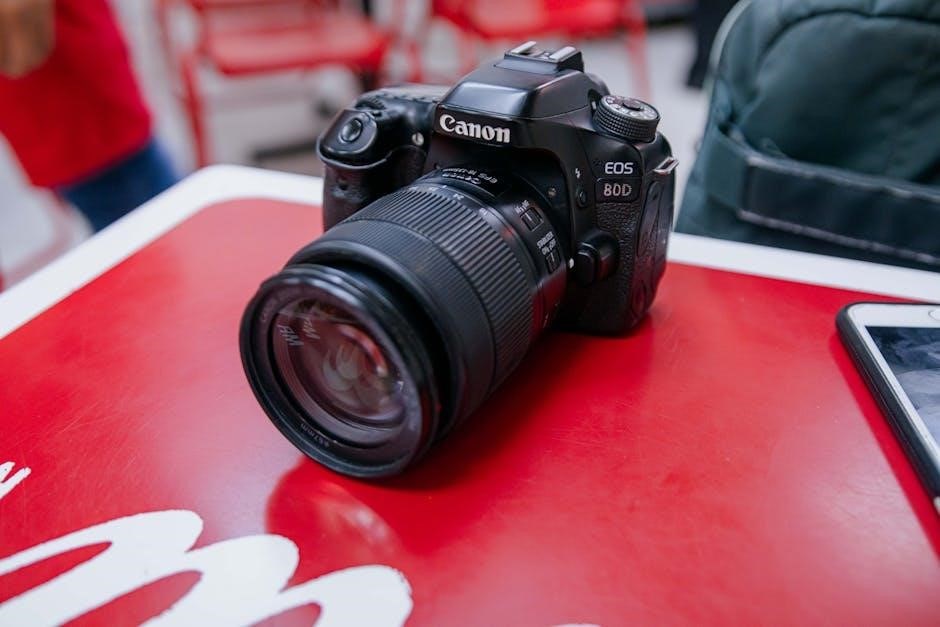
Overview of the Canon EOS 80D
The Canon EOS 80D is a versatile and powerful DSLR camera designed for enthusiasts and semi-professionals. Released in 2016, it combines a durable, weather-resistant body with advanced features like manual controls and wireless connectivity. The camera supports a wide ISO range, fast autofocus, and high-quality video recording. Its compatibility with a broad range of Canon lenses and accessories makes it adaptable for various photography needs. With firmware upgrade capabilities and integration with Canon’s software ecosystem, the EOS 80D remains a reliable choice for capturing stunning images and videos in diverse conditions.
Key Features of the Canon EOS 80D
The Canon EOS 80D boasts a 24.2MP APS-C CMOS sensor and DIGIC 6 processor for crisp, high-quality images. It features a 45-point cross-type autofocus system, ensuring precise and fast focus acquisition. The camera supports an ISO range of 100-16000, making it versatile for various lighting conditions. It also offers 1080p video recording at 60fps for smooth motion capture. With built-in Wi-Fi and NFC, the EOS 80D enables seamless connectivity and remote shooting via the Canon Camera Connect app. Its weather-resistant design and compatibility with a wide range of EF and EF-S lenses enhance its adaptability for diverse photography needs;
Camera Specifications
The Canon EOS 80D features a 24.2MP APS-C CMOS sensor, DIGIC 6 processor, ISO 100-16000, and 7fps continuous shooting, delivering robust performance for photographers.
Image Sensor and Processor
The Canon EOS 80D is equipped with a 24.2-megapixel APS-C CMOS sensor, ensuring high-resolution images with excellent detail. Paired with the DIGIC 6 image processor, it delivers enhanced image clarity, reduced noise, and improved color accuracy. This powerful combination supports a wide ISO range for shooting in various lighting conditions. The sensor captures sharp images, while the processor ensures efficient data handling, enabling faster operation and improved autofocus performance. Together, they provide a solid foundation for both still photography and video recording.
ISO Range and Noise Performance
The Canon EOS 80D features a native ISO range of 100-16,000, expandable to 25,600 for low-light shooting. The DIGIC 6 processor effectively minimizes noise, producing clean images even at higher sensitivities. Fine Detail and low-noise performance make it suitable for both stills and video in challenging lighting conditions.
Autofocus System
The Canon EOS 80D features a 45-point all-cross-type AF system, delivering fast and precise focus acquisition. This advanced system excels in dynamic and fast-moving subjects, ensuring sharp results. The Dual Pixel CMOS AF technology enhances focusing during video recording and live view, providing smooth and natural transitions. The AF system is highly customizable, with options like AF point expansion and zone AF, allowing photographers to adapt to various shooting scenarios. This robust autofocus performance makes the EOS 80D ideal for sports, wildlife, and portrait photography.
Video Recording Capabilities
The Canon EOS 80D supports Full HD video recording at 1080p resolution, with frame rates up to 60fps for smooth motion capture. It offers manual control over aperture, shutter speed, and ISO during video recording, allowing for creative flexibility. The Dual Pixel CMOS AF ensures fast and precise autofocus, even during video recording, making it ideal for dynamic scenes. The camera also features a headphone jack for audio monitoring and supports external microphones for high-quality sound. Time-lapse and HDR movie modes are available, enhancing creative possibilities. The vari-angle 3.0″ LCD touchscreen simplifies framing and focusing during video capture.

Wireless Functionality
The Canon EOS 80D features built-in Wi-Fi and NFC for seamless connectivity, enabling easy image transfer and remote shooting via the Canon Camera Connect app.
Wi-Fi and NFC Connectivity
The Canon EOS 80D offers built-in Wi-Fi and NFC capabilities, enabling straightforward wireless connectivity. Users can transfer images to compatible devices or upload directly to online platforms. NFC allows for quick pairing with Android devices by simply tapping the camera to the device. This feature enhances convenience and efficiency, making it ideal for sharing photos on social media or backing up content. Additionally, Wi-Fi connectivity supports remote shooting through the Canon Camera Connect app, allowing users to control the camera settings and preview shots from a smartphone or tablet. This seamless integration ensures a modern, connected photography experience.
Canon Camera Connect App
The Canon Camera Connect app enables seamless connectivity between the EOS 80D and compatible smartphones or tablets. This app allows users to transfer images, remotely control the camera, and adjust settings like ISO, aperture, and shutter speed. It also supports live view monitoring, enabling real-time preview of shots. The app is available for both iOS and Android devices, making it versatile for various users. By linking the camera to the app via Wi-Fi or NFC, photographers can enhance their workflow, share images instantly, and enjoy a more dynamic shooting experience. This tool is essential for modern, connected photography.
Manual Controls and Customization
The Canon EOS 80D offers extensive manual controls, including M, Av, and Tv modes, allowing precise adjustments for aperture, shutter speed, and ISO. Custom settings enable personalized configurations, enhancing creative flexibility and workflow efficiency for photographers.
Manual Mode (M)
In Manual Mode (M), the Canon EOS 80D grants full control over aperture, shutter speed, and ISO, allowing photographers to tailor settings for precise creative results. Users can manually adjust these parameters using the mode dial and rear control dial. This mode is ideal for those who prefer complete control over their shots, enabling fine-tuned exposures in various lighting conditions. The DIGIC 6 processor ensures accurate image processing, delivering sharp and detailed results. Manual Mode is particularly useful for learning photography fundamentals and achieving personalized artistic effects.
Aperture Priority (Av)
Aperture Priority (Av) mode on the Canon EOS 80D allows users to set the desired aperture while the camera automatically adjusts the shutter speed for a balanced exposure. This mode is ideal for controlling depth of field, enabling photographers to isolate subjects or ensure sharpness across the frame. By adjusting the aperture using the rear control dial, users can achieve creative effects like blurred backgrounds or sharp landscapes. The DIGIC 6 processor ensures accurate exposures, making Av mode a versatile choice for various shooting scenarios, from portraits to wide-angle photography.
Shutter Priority (Tv)
Shutter Priority (Tv) mode on the Canon EOS 80D lets users set the shutter speed while the camera adjusts the aperture for proper exposure. This mode is perfect for capturing motion, allowing photographers to freeze fast-moving subjects or create artistic motion blur. The shutter speed can be set between 1/8000 of a second and 30 seconds using the rear control dial. The DIGIC 6 processor ensures accurate exposures, even in challenging lighting conditions. Shutter Priority is ideal for action photography, creative effects, and controlling the flow of movement in images. It offers a balance of control and automation for versatile shooting scenarios.
Custom Settings
Custom Settings on the Canon EOS 80D allow users to personalize camera operations to suit their preferences. These settings can be saved to memory cards and transferred between cameras, enabling consistent workflows. Users can customize button functions, dial operations, and other controls for quicker access during shooting. For example, the shutter button can be configured for AF start, and the rear dial can be set for exposure compensation. Custom settings also include options like focusing modes, metering preferences, and default shooting modes. This feature enhances efficiency and adapts the camera to individual shooting styles, making it ideal for professionals and enthusiasts seeking tailored control.
Firmware and Software
The Canon EOS 80D supports firmware upgrades for enhanced functionality. EOS Utility software enables camera control and image transfers, while Canon DPP offers advanced RAW file editing.
Firmware Upgrade Process
The Canon EOS 80D allows for firmware upgrades to enhance functionality and fix issues. To upgrade, download the latest firmware from Canon’s official website and copy it to a memory card. Insert the card into the camera and navigate to the firmware update option in the menu. Follow on-screen instructions to complete the update. Ensure the camera is fully charged or use an AC adapter to avoid interruptions. Do not turn off the camera during the process. Once completed, restart the camera to apply the updates. Always use official Canon sources for firmware to ensure compatibility and security.
EOS Utility Software
EOS Utility Software is a powerful tool for Canon EOS 80D users, enabling image transfer, camera settings adjustment, and firmware updates. It supports tethered shooting, allowing direct camera control from a computer. The software is compatible with the EOS 80D and can be downloaded from Canon’s official website. It requires a memory card for firmware updates and ensures the camera stays updated with the latest features. EOS Utility is essential for professionals and enthusiasts seeking advanced camera control and seamless integration with their workflow. Always use the official Canon website to download the software for safety and functionality.
Canon Digital Photo Professional (DPP)
Canon Digital Photo Professional (DPP) is a powerful software for editing and enhancing RAW images captured with the EOS 80D. It offers advanced tools for noise reduction, color correction, and detail adjustment, allowing photographers to maximize image quality. DPP supports tethered shooting and is compatible with the EOS 80D, enabling seamless integration with the camera. The software is available for download from Canon’s official website and is essential for professionals and enthusiasts seeking precise control over their images. By mastering DPP, users can unlock the full potential of their EOS 80D’s RAW files and achieve professional-grade results.
Lenses and Accessories
The Canon EOS 80D supports EF-S and EF lenses, offering versatility for photographers. It also offers a range of compatible accessories, enhancing functionality and user experience.
Compatible Lenses
The Canon EOS 80D is compatible with EF-S and EF lenses, offering a wide range of focal lengths and aperture options. Popular choices include the EF-S 18-135mm f/3.5-5.6 IS USM for versatility and the EF 50mm f/1.8 STM for portraits. Third-party lenses like Sigma and Tamron also work seamlessly with the 80D, providing affordable alternatives. Lens compatibility ensures photographers can explore various genres, from wide-angle landscapes to telephoto wildlife photography. Additionally, Canon’s lens lineup supports advanced features like image stabilization and fast autofocus, enhancing creativity and performance for both amateurs and professionals. Regular firmware updates ensure optimal compatibility and functionality across all lenses.
External Flash and Accessories
The Canon EOS 80D supports a variety of external flashes and accessories to enhance functionality. The Speedlite 430EX III-RT and 600EX II-RT are popular choices, offering E-TTL II metering and wireless connectivity. Third-party flashes like Yongnuo YN600EX-RT II also work seamlessly with the 80D, providing similar features at affordable prices. Additional accessories include remote shutters, tripods, and camera bags. The Speedlite 600EX II-RT is weather-sealed, making it ideal for outdoor use. These tools expand the camera’s capabilities, allowing photographers to achieve professional results in diverse lighting conditions and settings, whether for still photography or video recording. Compatibility ensures optimal performance across all accessories.
Third-Party Compatibility
The Canon EOS 80D is compatible with a wide range of third-party accessories, including lenses, flashes, and gimbals. Brands like Sigma and Tamron offer lenses with full autofocus and aperture control. Yongnuo flashes, such as the YN600EX-RT II, integrate seamlessly with the camera’s E-TTL II system. Additionally, third-party gimbals like the CRANE 3S support the 80D, offering smooth stabilization for video recording. These third-party options provide cost-effective alternatives to Canon-branded accessories while maintaining high performance and compatibility, making the EOS 80D a versatile choice for photographers and videographers seeking expanded functionality.
Troubleshooting and Maintenance
Regularly clean the sensor and lens to prevent dust spots. Update firmware for optimal performance. Refer to the manual for error code solutions and maintenance tips.
Common Error Codes and Solutions
The Canon EOS 80D may display error codes like Err99, Err01, or Err50, indicating issues such as communication problems, lens errors, or shutter malfunctions. For Err99, try removing the battery and lens, then restarting the camera. Err01 often occurs due to faulty or incompatible lenses; ensure the lens is properly connected and clean. Err50 may indicate a shutter issue, requiring professional servicing. Regularly cleaning the sensor and updating firmware can prevent many errors. If issues persist, consult the official Canon manual or contact support for assistance.
Cleaning and Maintenance Tips
Regularly clean the EOS 80D’s sensor using a blower or dampening sensor swabs to remove dust. Use a microfiber cloth to wipe the exterior and lens surfaces, avoiding harsh chemicals. Clean memory cards with isopropyl alcohol and a soft cloth. Update firmware periodically to ensure optimal performance. Store the camera in a dry, cool environment to prevent humidity damage. For lenses, use a UV filter for protection and clean with a circular motion. Schedule professional servicing every 1-2 years for internal maintenance. Always handle the camera with care to extend its lifespan and maintain image quality.