invacare reliant 450 owners manual
Overview
The Invacare Reliant 450 owners manual offers concise guidance on safe handling, setup, and daily use of this patient lift․ It explains key features, operational limits, and basic troubleshooting to ensure reliable performance and user confidence․ Follow all safety guidelines to maximize longevity․ Enjoy

Purpose of the Manual
The Invacare Reliant 450 owners manual is designed to equip caregivers, technicians, and patients with a comprehensive reference that ensures the lift is operated safely, assembled correctly, and maintained consistently․ It consolidates manufacturer‑approved procedures, safety warnings, and troubleshooting guidelines into a single, easy‑to‑consult document․ By following the manual, users can prevent common mishaps such as over‑tightening mounting bolts, mis‑aligning the actuator, or exceeding load limits, all of which could compromise patient safety or damage the unit․ The manual also details the lift’s key specifications—maximum patient weight, battery capacity, and hydraulic pressure—so that operators can match the device to the care environment․ In addition, it provides step‑by‑step instructions for routine maintenance tasks, including battery checks, hydraulic fluid replacement, and actuator lubrication, thereby extending the lifespan of the equipment․ For technicians, the troubleshooting section offers diagnostic cues and corrective actions for frequent issues such as motor stalls, hydraulic leaks, or electronic fault codes․ Overall, the manual serves as the authoritative source for training, daily operation, and long‑term reliability of the Invacare Reliant 450, promoting confidence and compliance with industry safety standards․
The manual also includes a quick‑reference chart summarizing key operational parameters, a battery charging schedule, and a checklist for pre‑use inspections․ This guide ensures safe efficient operation․

Safety Precautions
Before operating the Invacare Reliant 450, read all warnings and follow these safety steps to protect both patient and operator․ Verify that the battery is fully charged and the charging cable is in good condition․ Do not exceed the maximum load of 400 lb (181 kg); use the load chart to confirm the patient’s weight․ Inspect the hydraulic fluid for leaks and maintain the recommended level․ Tighten all mounting bolts to the manufacturer’s torque specification—over‑tightening can damage the bracket, while under‑tightening may cause loosening during use․ Use only the supplied actuator and avoid aftermarket parts that could alter the lift’s balance․ When lifting, keep the patient’s head and shoulders aligned with the lift axis and avoid sudden jerks․ Do not use the lift on uneven or slippery floors․ Ensure all safety locks are engaged before moving the boom․ In case of power failure, use the emergency manual override to lower the patient safely․ If the lift displays a fault code, refer to the troubleshooting section before restarting․ Never operate the lift with a low battery level at all times․ Keep the operator’s manual in the vehicle and update it with any service records․ Finally, train all users on proper positioning, weight distribution, and emergency procedures to minimize injury risk․ The lift’s emergency stop button must be within reach at all times․ Keep the patient’s limbs secured with the provided restraints to prevent accidental dislodgement․ Report damage to the service center immediately․ Always consult the manufacturer’s service manual for detailed maintenance intervals and replacement part lists!!!․

Product Description
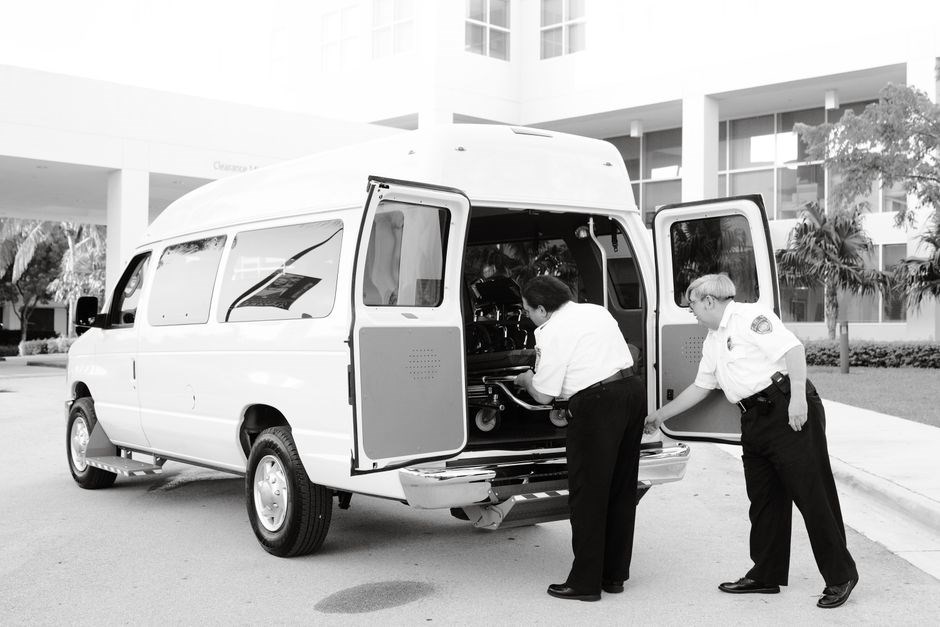
The Invacare Reliant 450 is a lightweight, battery‑powered patient lift designed for safe, efficient transfers․ It features a 400‑lb capacity, hydraulic lift system, and ergonomic controls․ The manual details assembly, operation, and maintenance for reliable performance․ It also has emergency stop and load‑sensing tech․
Model Features
Designed for versatility, the Invacare Reliant 450 incorporates a 400‑lb capacity, a 6‑foot maximum lift height, and a 120‑lb load‑sensing system that automatically adjusts power output․ The hydraulic cylinder delivers smooth, quiet operation, while the integrated battery pack offers up to 3 hours of continuous use on a single charge․ A lightweight aluminum frame keeps the overall weight under 200 lb, enabling easy maneuverability in tight spaces․ The lift’s ergonomic control panel features large, backlit buttons and an intuitive LED display that shows battery status, load weight, and error codes․ Safety is enhanced by a dual‑lock system that secures the patient platform during transfer, and an emergency stop button that halts all motion instantly․ The device also includes a built‑in tilt‑adjustment lever for fine‑tuning the platform angle, and a removable, washable seat cushion for patient comfort․ With a quick‑release footrest and a foldable handle, the Reliant 450 can be transported and stored with minimal effort․ The manual provides detailed assembly instructions, load limits, and recommended maintenance intervals to ensure optimal performance and longevity․ The 12‑V, 20‑Ah battery delivers a nominal voltage of 12 V and can be recharged via a standard AC outlet using the supplied charger, which takes approximately 4 hours to reach full capacity․ The lift’s power consumption is efficient, drawing no more than 1․5 kW during peak operation․ The fold‑down handle integrates a quick‑connect system for the hydraulic hose, allowing technicians to replace the cylinder without disassembling the entire unit․ The device is compliant with OSHA and ANSI standards for patient handling equipment, ensuring it meets rigorous safety criteria; The manual also outlines recommended load distribution, maximum platform tilt angles, and guidelines for using the lift in various clinical environments․ For optimal safety, operators should verify hydraulic hose integrity, ensure platform is level before each use, and battery charge indicator for daily check daily promptly!?!
Technical Specifications
Dimensions: 48․5 in․ (L) × 24․3 in․ (W) × 35․2 in․ (H)․ Net weight: 185 lb․ Max lift height: 6 ft․ Hydraulic system: 1․5‑bar pressure, 0․5 in․ stroke․ Power: 12‑V DC, 1․5 kW peak․ Battery: 12‑V, 20‑Ah, 4‑hour recharge․ Control: 2‑speed electric motor, 0․8 mph max․ Safety: dual‑lock mechanism, emergency stop, tilt‑limit 15°․ Compliance: OSHA, ANSI, ISO 13485․ Warranty: 2 years parts, 1 year labor․
- Overall dimensions: 48․5 in․ (L) × 24․3 in․ (W) × 35․2 in․ (H)․ Net weight 185 lb, ensuring a compact footprint for tight spaces․
- Maximum lift height of 6 ft provides ample reach for patient transfers, while the hydraulic cylinder delivers 1․5‑bar pressure for smooth operation․
- A 12‑V DC motor runs at 0․8 mph maximum speed, powered by a 20‑Ah battery that recharges fully in about 4 hours, ensuring continuous use․
- The dual‑lock safety system secures the platform during lift and transfer, while an emergency stop button halts all motion instantly․
- Noise level is kept below 60 dB during operation, making it suitable for quiet hospital rooms and patient care areas․
- The device complies with OSHA, ANSI, and ISO 13485 standards for patient handling equipment, ensuring regulatory safety and quality․
- Routine maintenance includes checking hydraulic fluid levels, inspecting the motor bearings, and cleaning the control panel for optimal performance․
- The lift’s maximum operating temperature is 40 °C, and it should be stored in a dry environment below 80 °F to maintain battery health․
- For extended service life, replace the hydraulic fluid every 12 months and perform a full system check after each major repair or relocation․
- The lift’s lever allows fine‑tuning of the platform angle, enhancing patient comfort during transfers․ today!!!

Installation and Setup
Unpack the lift, verify all parts, and secure the base on a level surface․ Connect the battery, test the control panel, and perform a safety lock check․ Follow the step‑by‑step guide to attach the boom, ensuring proper torque and alignment before first use․ Ensure all bolts are tightened to spec․ Check․ Tight
Unpacking and Inspection
During the unpacking phase, it is essential to verify the integrity of all electrical connections․ Begin by inspecting the battery cable for any signs of wear, such as fraying or kinks, and ensure the connector pins are clean and free of corrosion․ Next, examine the boom cable, checking for exposed wires or insulation damage that could compromise safety․ The mounting bracket should be inspected for proper alignment; verify that the mounting holes on the bracket correspond exactly to the attachment points on the boom, and that no burrs or deformities are present․ The shoulder bolt must be checked for any damage to its head or threads, and the washer should be seated correctly to prevent slippage․ The control panel should be inspected for any loose or damaged components; all indicator lights should be functioning, and the power switch should be in the OFF position when the unit is not in use․ Finally, review the instruction booklet for any missing pages or illegible safety warnings, and confirm that the user manual is present and complete․ Store any spare parts in the supplied pouch for easy access during future maintenance․
Assembling the Actuator to the Boom
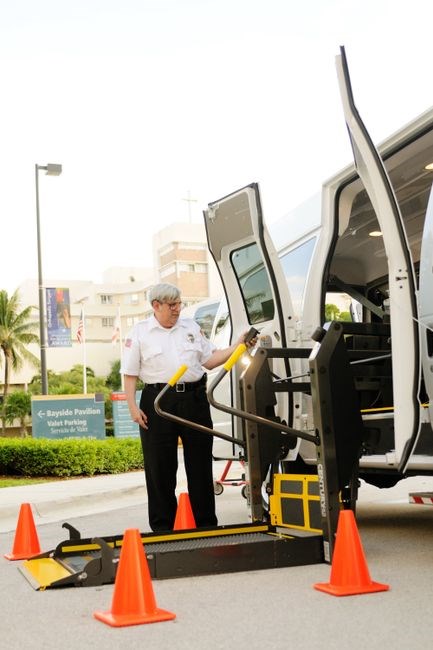
Begin by positioning the actuator on the boom’s mounting bracket, aligning the pre‑installed bushings with the bracket’s holes․ Carefully slide the shoulder bolt through the bracket, then place the washer on the bolt head․ Insert the nut and hand‑tighten to secure the actuator, ensuring the bolt sits flush against the bracket․ Avoid overtightening, as this can damage the mounting bracket or deform the actuator housing․ Use a torque wrench set to the manufacturer’s specified value, typically 20–25 ft‑lb for the Reliant 450, and tighten in a cross‑pattern to distribute force evenly․ Once the actuator is secured, connect the power cable to the actuator’s terminal block, checking that the polarity matches the manual’s diagram․ Inspect the cable for any kinks or abrasion before routing it along the boom’s cable tray․ Secure the cable with the supplied cable ties, leaving a 2‑inch slack to accommodate boom movement․ Verify that the actuator’s hydraulic line is free of leaks and properly seated in the line connector; a small leak can compromise lift performance․ After all connections are made, perform a quick functional test: power on the unit, engage the lift button, and observe the actuator’s movement․ The boom should rise smoothly without binding․ If resistance is felt, double‑check bolt torque and cable routing․ Finally, document the assembly by noting the bolt torque value and any observations in the maintenance log․ This record will aid future troubleshooting and ensure compliance with safety standards․ All steps are verified before unit is deployed․!!

Operation
The Invacare Reliant 450 operates via a battery‑powered hydraulic lift․ Engage the main switch, select the desired lift height, and use the control panel to raise or lower the patient platform․ Follow safety limits and monitor battery level during use․ Ensure grounding and inspect․ now․
Operating the Lift
Before each use, verify the battery charge and ensure the platform is clean․ Turn on the main power switch located on the rear panel․ The lift’s hydraulic system will engage automatically․ Select the desired height using the thumb‑wheel on the control panel; the indicator will display the target level․ To raise the platform, press the “UP” button; to lower, press “DOWN”․ The lift will move at a controlled speed, and the safety lock will engage once the platform reaches the set height․ Always keep both hands on the handle bar during movement to maintain stability․ For patient transfer, position the platform beneath the patient, secure the harness, and gently lower the patient onto the platform․ Once the patient is seated, raise the platform to the desired height; Monitor the battery gauge; if it drops below 20%, the lift will automatically stop and display a low‑battery warning․ In case of an emergency stop, press the red button on the control panel; the lift will halt immediately and the hydraulic fluid will remain in the reservoir․ After each session, lock the platform in the “OFF” position and close the battery cover․ Store the unit in a dry, temperature‑controlled environment to preserve battery life and hydraulic fluid integrity․
Ensure the platform is level before lifting․ Use the safety latch to secure the platform during transfer; Check the hydraulic fluid level regularly; low fluid can impede lift operation․ When the battery indicator shows low, recharge promptly to avoid interruptions․ ․․․!
User Controls
The Invacare Reliant 450 features a compact control panel mounted on the rear of the unit․ The panel includes a main power switch, a pair of directional buttons, a height selector wheel, an emergency stop button, and a battery status indicator․ The power switch is a large, green toggle that must be engaged before any operation; the unit will not respond to other controls if this switch remains off․ Press the “UP” button to raise the platform; the lift will advance at a steady, controlled rate until the desired height is reached․ The “DOWN” button performs the opposite action, lowering the platform safely․ The height selector wheel allows the operator to set a target elevation; the numeric display will show the current level in inches․ The emergency stop button is a bright red, momentary push‑button that immediately cuts power to the hydraulic pump, bringing the platform to a halt․ This feature is essential for rapid response in case of obstruction or patient distress․ The battery status indicator is a small LED bar that reflects the remaining charge; when the bar drops below the third segment, a low‑battery warning will appear on the display․ The operator should recharge the battery promptly to maintain continuous service․ All controls are designed with ergonomic grips and tactile feedback to reduce operator fatigue․ The panel also includes a safety lock switch that must be engaged before the lift can be powered; this prevents accidental activation during maintenance or when the unit is not in use․ The combination of these controls provides a straightforward, intuitive interface for safe and efficient patient handling․
For optimal performance, keep the lift’s hydraulic reservoir filled to the recommended level and inspect hoses for wear every six months․ If fluid leaks, replace the hose and re‑fill․ Always use the correct patient harness and ensure the platform is level before lifting․ This ensures safety and prolongs equipment life․ Keep it clean․for leaks!!․

Maintenance and Troubleshooting
Regularly inspect hydraulic lines, replace worn seals, and check battery charge․ Clean the platform, lubricate moving parts, and verify safety locks․ If the lift lags, flush the reservoir and replace filters․ Report any abnormal noises promptly․Keep systems clean․
Routine Maintenance
Daily cleaning of the platform, boom, and hydraulic reservoir prevents debris buildup that can impede movement․ Use a soft cloth and mild detergent; avoid abrasive cleaners that may damage surfaces․ After wiping, dry thoroughly to avoid moisture in electrical contacts․ Inspect the hydraulic fluid level every week; top up with the manufacturer‑specified fluid if below the minimum mark․ Check for leaks around the reservoir, hoses, and fittings; replace any damaged hose immediately․ Examine the battery pack for corrosion or loose connections; clean terminals with a cotton swab and apply a thin coat of dielectric grease․ Verify that the battery charge indicator displays a full charge before each shift; recharge or replace the battery if the charge falls below the recommended threshold․ Test the emergency stop button and safety switches at least once a day; ensure they engage and disengage smoothly․ Inspect the mounting brackets and bolts for tightness, but do not overtighten, as this can strip threads․ Lubricate pivot points and hinge joints with a silicone‑based grease every month to reduce wear․ Check the platform rails for dents or cracks; replace any damaged rail promptly․ Perform a functional test of the lift by running a full cycle without a patient; listen for unusual noises and verify that the lift reaches the maximum height․ Maintain a log of all inspections, fluid changes, and parts replacements; review the log monthly to anticipate future maintenance needs․ Keep spare parts such as hydraulic seals, bolts, and battery cells on hand to minimize downtime․ Finally, schedule a professional service inspection at least once a year to verify that all safety systems are operating correctly and to update firmware or software as needed․ All steps logged daily!
Common Issues and Fixes
Lift fails to raise: Check fluid level; top up if low․ Inspect reservoir for air bubbles and purge․ Verify battery is charged before use and power switch is on․ If lift still does not move, examine pump for wear and replace if needed․
Platform moves slowly or stalls: Clean rails and clear debris․ Lubricate pivot points with silicone grease․ Inspect motor for overheating; if hot, replace motor or cooling fan․
Emergency stop button unresponsive: Inspect switch contacts for corrosion․ Clean with dry cloth and apply dielectric grease․ If button still does not engage, replace the assembly․
Battery drains quickly: Verify battery pack is charged before use․ Check for loose or corroded terminals and clean․ If battery life remains short, replace cells with OEM parts․ Ensure charging system works by checking indicator lights during a full charge cycle․

Audible clicking or grinding: Inspect hoses for kinks or damage․ Replace cracked or frayed hoses․ Check mounting brackets for loose bolts; tighten to manufacturer torque․ If noises persist, examine pump for wear and replace if needed․
Display shows error codes: Refer to diagnostic chart in manual․ Reset by disconnecting battery for 30 seconds and reconnecting․ If error code remains, contact technical support for advanced troubleshooting․ Additional note: Keep the lift’s hydraulic level between minimum and maximum marks, and avoid overloading the platform beyond its rated capacity․ Inspect safety switches regularly for proper engagement․ daily․use
Final reminder: Place the lift on a stable, level surface; Secure all safety straps and confirm the patient’s weight is within limits․ Follow the manufacturer’s maintenance schedule to ensure safe operation․․