lift manual
A lift manual is a comprehensive guide providing essential information on safe operation, maintenance, and troubleshooting of various lift types. It ensures proper usage and compliance with safety standards, covering hydraulic, scissor, boom, and material lifts. These manuals are crucial for operators to understand equipment capabilities, limitations, and procedures, promoting workplace safety and efficiency.
1.1 What is a Lift Manual?

A lift manual is a detailed guide providing essential information for the safe and effective operation of lifts. It includes instructions, safety protocols, and technical specifications. Manuals vary by lift type, such as hydraulic, scissor, or boom lifts, and cover topics like weight capacity, proper usage, and maintenance. They serve as a critical resource for operators, ensuring compliance with safety standards and optimal equipment performance. Lift manuals are often tailored to specific models, offering step-by-step guidance for troubleshooting and routine inspections. They are indispensable for minimizing risks and maximizing efficiency in industrial and construction environments. Key sections include safety precautions, operational limits, and emergency procedures.
1.2 Importance of a Lift Manual
A lift manual is essential for ensuring the safe and efficient operation of lifting equipment. It provides critical information on weight limits, proper usage, and maintenance, helping operators avoid accidents and equipment damage. By following the manual, users can ensure compliance with safety standards and regulations. It also serves as a reference for troubleshooting common issues, minimizing downtime. The manual is vital for training new operators, promoting consistent and safe practices. Ultimately, it protects both the equipment and the people using it, ensuring optimal performance and longevity of the lift. Safety and efficiency are significantly enhanced with a well-understood lift manual.
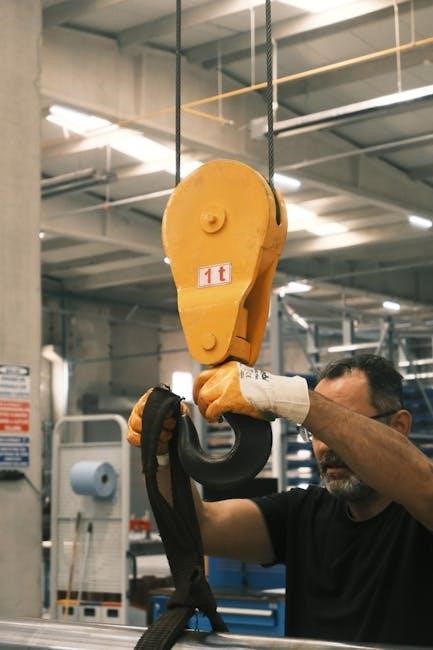
Types of Lifts
Lifts are categorized into hydraulic, scissor, boom, and material lifts, each designed for specific tasks. Hydraulic lifts use fluid pressure for smooth operation, while scissor lifts rely on crisscross mechanisms. Boom lifts feature extendable arms for reaching heights, and material lifts are ideal for heavy-duty cargo handling. Each type serves unique purposes, ensuring efficiency in various industries.
2.1 Hydraulic Lifts
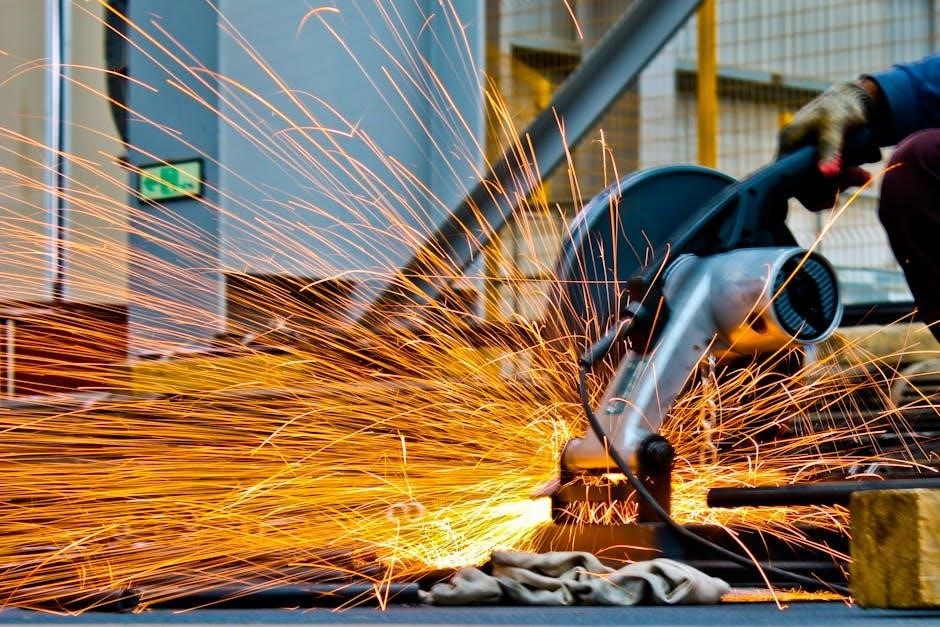
Hydraulic lifts operate using pressurized fluid to lift heavy loads. They are known for their stability and smooth operation, making them ideal for industrial and automotive applications. These lifts use hydraulic cylinders and pumps to generate lifting force, ensuring precise control. Hydraulic lifts are often used in garages, warehouses, and construction sites due to their high weight capacity and reliability. Regular maintenance, such as fluid level checks and cylinder inspections, is essential for optimal performance. Their durability and versatility make them a popular choice for various lifting needs, providing consistent and efficient operation in demanding environments.
2.2 Scissor Lifts
Scissor lifts are versatile lifting solutions commonly used in construction, warehouses, and retail settings. They utilize a scissor-like mechanism to raise platforms to varying heights, providing stable and secure elevation. These lifts are ideal for tasks requiring vertical reach, such as changing light bulbs or accessing high shelves. Scissor lifts are available in both manual and electric models, with some designs offering mobility for easy repositioning. Proper training and adherence to safety guidelines are essential for safe operation. Regular maintenance, such as inspecting hydraulic hoses and lubricating moving parts, ensures optimal performance and longevity of the equipment.
2.3 Boom Lifts
Boom lifts are compact machines featuring a platform attached to a long hydraulic arm, allowing for extended reach and versatility. They are commonly used in construction and maintenance for tasks requiring both height and horizontal reach. Boom lifts can be categorized into two main types: straight (telescopic) and articulating (knuckle) booms. These lifts offer excellent maneuverability and are ideal for navigating obstacles. Proper training is essential for operators to handle boom lifts safely. Regular maintenance, such as inspecting hydraulic systems and ensuring stable setup, is crucial to prevent accidents and ensure reliable performance. Always refer to the lift manual for specific operational guidelines and safety protocols.
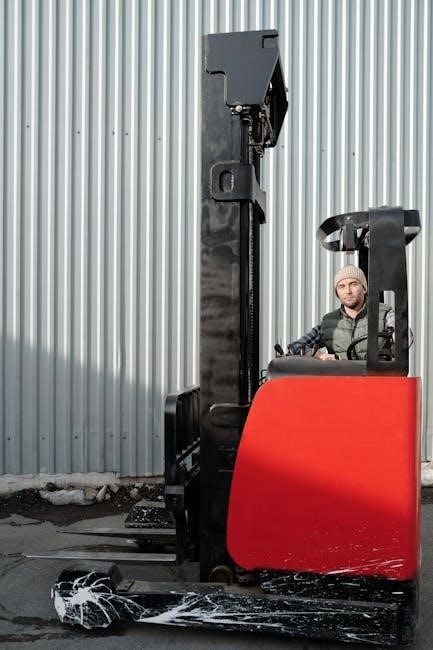
2.4 Material Lifts
Material lifts are specialized equipment designed to safely move heavy loads vertically or horizontally. They often feature manual or hydraulic operation, with weight capacities ranging from 700 to 1,000 lbs. These lifts are ideal for construction sites, warehouses, and industrial settings, offering a lift range of 13-15 ft. Material lifts are durable and versatile, allowing for efficient material handling. Proper use requires adherence to weight limits and stable setup. Regular maintenance, such as lubrication and inspection, ensures optimal performance. Operators should always consult the lift manual for specific guidelines. Material lifts are essential tools for streamlining workflows while maintaining safety and operational efficiency in demanding environments.
Safety Features and Precautions
Adhering to load limits and using redundant controls ensures safe operation. Proper training and regular inspections are vital to prevent accidents and maintain equipment reliability over time.
3.1 Emergency Controls and Functions

Emergency controls are critical for safe lift operation. Redundant systems, like backup hand controls, ensure functionality even if primary controls fail. Emergency lowering systems allow operators to safely descend in case of power loss or malfunction. These features are designed to protect users and prevent accidents. Regular testing of emergency functions is essential to ensure reliability. Proper training on these controls is vital for operators to respond effectively in urgent situations. Always refer to the lift manual for specific emergency procedures tailored to your equipment model.
3.2 Weight Capacity and Load Limits
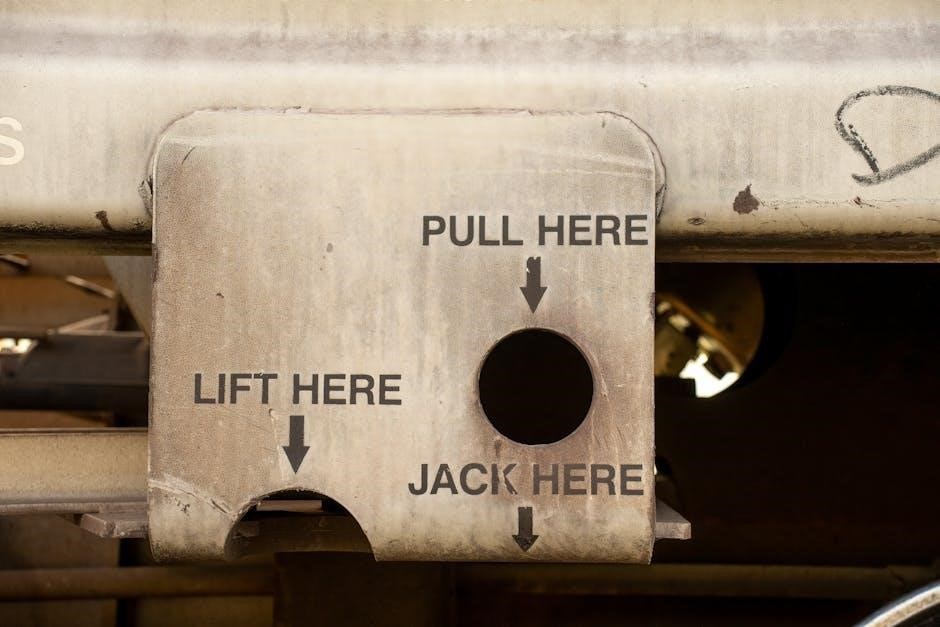
Understanding weight capacity and load limits is essential for safe lift operation. Exceeding these limits can lead to equipment failure or accidents. Always refer to the lift manual for specific load ratings, as they vary by model. For example, the LEVANTAR Floor Lift has a 500 lbs capacity, while material lifts can handle 700-1,000 lbs. Never overload the lift, as it compromises stability and safety. Proper load assessment and adherence to these limits ensure efficient and secure lifting operations. Ignoring weight limits can result in severe consequences, including equipment damage or personal injury. Always verify the load weight before operation and follow the manual’s guidelines strictly.
3.3 Proper Operating Techniques
Proper operating techniques are crucial for safe and efficient lift usage. Always start with a thorough pre-operation inspection, ensuring all components are functional. Move the lift slowly and deliberately, avoiding sudden jerks or sharp turns. Stabilize the lift on level ground before elevating to maintain balance. When lifting, keep the load centered and within the designated weight capacity. Use control systems smoothly, and never exceed the lift’s reach or height limits. Refer to the manual for specific techniques tailored to your lift type, such as hydraulic, scissor, or boom lifts. Proper training and adherence to these methods minimize risks and ensure optimal performance. Consistent practice enhances operator proficiency and safety.
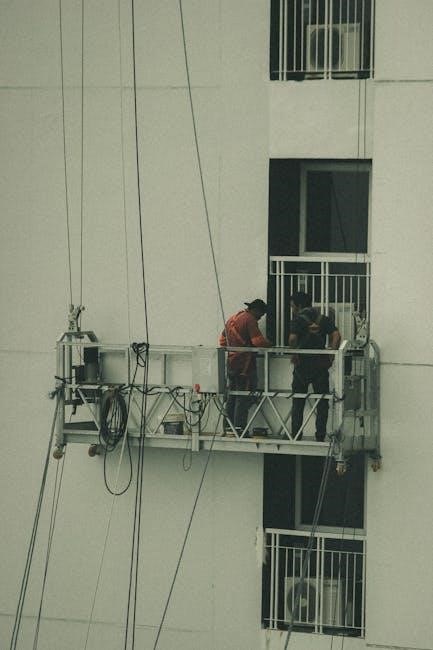
3.4 Personal Protective Equipment (PPE)
Personal Protective Equipment (PPE) is essential for ensuring operator and bystander safety during lift operations. Hard hats, safety glasses, and gloves are fundamental to protect against falling objects, debris, and mechanical hazards. Steel-toe boots prevent foot injuries from heavy equipment or tools. High-visibility vests enhance visibility in low-light environments, reducing collision risks. Respiratory protection may be required in dusty or hazardous environments. Proper PPE ensures compliance with safety regulations and minimizes workplace accidents. Always inspect PPE before use and replace damaged items. Training on PPE usage is critical for maintaining a safe working environment and preventing potential injuries or fatalities during lift operations.
Maintenance and Servicing
Regular maintenance ensures optimal performance and safety. Daily inspections and scheduled servicing are crucial. Lubrication and hydraulic checks prevent wear and tear. Follow manufacturer guidelines for longevity.
4.1 Daily Inspection Checklist
Daily inspections are vital for ensuring lift safety and functionality. Operators should check hydraulic fluid levels, control functions, and wear on wire ropes or chains. Look for any damage or leaks in hydraulic components. Verify that all safety devices, such as emergency stops and load sensors, are functioning correctly. Ensure proper tire inflation and test brake systems. Lubricate moving parts as specified by the manufacturer. A thorough review of the lift’s condition helps prevent breakdowns and accidents, ensuring smooth operation and compliance with safety standards. Keep a record of inspections for maintenance tracking.
4.2 Scheduled Servicing Requirements
Scheduled servicing is essential for maintaining lift performance and safety. Regular maintenance should be performed every 3 to 6 months, depending on usage. Hydraulic systems require fluid changes and filter replacements to prevent contamination. Electrical components, such as control panels and sensors, should be inspected and tested for proper function. Check and replace worn or damaged parts like seals, hoses, and belts. Adhere to the manufacturer’s recommended service intervals to ensure optimal functionality. Additionally, lubricate moving parts and inspect wire ropes for fraying. Keeping detailed service records helps track maintenance history and ensures compliance with safety regulations.
4.3 Lubrication and Hydraulics
Lubrication is critical for smooth operation of lift components, reducing friction and wear on moving parts. Hydraulic systems require regular fluid checks to ensure optimal performance. Use high-quality hydraulic oil that meets manufacturer specifications to prevent contamination and maintain system pressure. Inspect hydraulic hoses and seals for leaks or damage, replacing them as needed. Lubricate pivot points, cylinders, and other moving parts periodically to avoid corrosion and ensure longevity. Always follow the manufacturer’s guidelines for lubrication intervals and hydraulic fluid replacement to maintain safety and efficiency in lift operations.
4.4 Record-Keeping for Maintenance
Accurate and detailed record-keeping is essential for maintaining lift equipment. This includes documenting all inspections, services, and repairs. Keep a log of maintenance activities, including dates, procedures performed, and parts replaced. Digital tools or maintenance software can streamline this process, ensuring compliance with safety standards. Proper documentation helps track equipment history, identify potential issues, and plan future services. It also serves as proof of adherence to regulatory requirements during audits. Regular updates and organization of records are vital for efficient maintenance management and ensuring operator safety. Neglecting record-keeping can lead to overlooked maintenance, safety hazards, and non-compliance with industry standards.

Troubleshooting Common Issues
Troubleshooting lift issues involves identifying malfunctions, addressing hydraulic or electrical faults, and resolving stabilizer imbalances. Regular checks and adherence to manual guidelines help prevent breakdowns and ensure safety.
5.1 Identifying Common Problems
Common lift issues include hydraulic malfunctions, electrical faults, and stabilizer imbalances. Hydraulic lifts may experience fluid leaks or cylinder failures, while scissor lifts often face platform alignment problems. Boom lifts can suffer from arm extension issues due to hydraulic or mechanical failures. Material lifts may encounter problems with load securing systems. Electrical faults, such as control panel malfunctions, can occur across all lift types. Operators should monitor for unusual noises, slow or erratic movements, and error messages. Regular inspections and adherence to manual guidelines help identify these problems early, preventing downtime and ensuring safety. Addressing these issues promptly is crucial for optimal performance.
5.2 Hydraulic System Malfunctions
Hydraulic system malfunctions are common in lifts, often due to fluid leaks, cylinder failures, or contamination. Lifts may experience slow or uneven movement, jerking, or complete shutdown. Overheating, noisy operation, or decreased lift capacity can indicate hydraulic issues. Operators should check for fluid leaks, low fluid levels, or blocked lines. Contamination from dirt or water can damage components, requiring costly repairs. Regular fluid changes and filter replacements are essential. If a hydraulic malfunction occurs, stop operation immediately and consult the manual for troubleshooting steps. Addressing these issues promptly prevents further damage and ensures safe, reliable lift performance.
5.3 Electrical System Faults
Electrical system faults in lifts can lead to sudden stoppages, erratic operation, or complete shutdown. Common issues include short circuits, faulty sensors, or wiring problems. Operators may notice error codes, flickering controls, or inconsistent power supply. Regular inspection of circuit breakers, connectors, and control panels is essential; Overloaded circuits or damaged wires can trigger malfunctions. Always disconnect power before inspecting electrical components. Consult the lift manual for diagnostic procedures and ensure repairs are performed by certified technicians. Ignoring electrical faults can compromise safety and lead to costly repairs. Proper maintenance and timely intervention are critical to preventing downtime and ensuring reliable operation.
5.4 Stabilizer and Balance Issues
Stabilizer and balance issues can compromise the safety and stability of a lift, leading to uneven operation or potential tipping. Common problems include worn-out stabilizer pads, misaligned frames, or defective sensors. Operators may notice wobbling, uneven leveling, or audible alarms. Regular inspection of stabilizer components and balance mechanisms is crucial. Ensure the lift is placed on a level surface and follows manual guidelines for setup. Malfunctioning sensors or hydraulic leaks can also affect balance. Immediate attention is required to prevent accidents. Always refer to the lift manual for recalibration procedures or component replacements. Proper stabilization ensures safe and precise lifting operations.
Future Trends in Lift Technology
Future trends in lift technology include automation, IoT integration, and eco-friendly solutions, enhancing efficiency and safety while reducing environmental impact and improving user experience.
6.1 Automation and Smart Lifts
Automation and smart lift technology are revolutionizing the industry by integrating AI-driven systems for enhanced efficiency and safety. These lifts feature real-time monitoring, self-diagnostic capabilities, and adaptive learning to optimize performance. Smart lifts can automatically adjust to load weights, stabilize platforms, and predict maintenance needs, reducing downtime. Advanced automation also enables remote operation and seamless integration with other equipment, streamlining workflows. Additionally, smart lifts incorporate energy-saving technologies, lowering operational costs and environmental impact. These innovations are reshaping how lifts operate, ensuring safer, more efficient, and user-friendly experiences across various industries.
6.2 Integration with IoT
Integration with IoT enables lifts to connect seamlessly with other devices and systems, enhancing operational efficiency and safety; IoT sensors monitor lift performance in real-time, providing insights into usage patterns, maintenance needs, and potential issues. This connectivity allows for predictive maintenance, reducing downtime by addressing problems before they escalate. IoT also improves user experiences by offering real-time updates, remote monitoring, and automated responses to emergencies. Additionally, IoT-enabled lifts can optimize energy consumption and integrate with building management systems for holistic control. This advanced connectivity is transforming lift technology, making it smarter, more efficient, and user-centric, while ensuring optimal performance and safety standards. IoT is reshaping the future of lift operations.
6.3 Eco-Friendly Lift Solutions
Eco-friendly lift solutions are revolutionizing the industry by prioritizing sustainability and reducing environmental impact. These lifts incorporate energy-efficient technologies, such as regenerative systems that capture and reuse energy during descent. Many modern designs utilize lightweight, recyclable materials, minimizing resource consumption and waste. Additionally, manufacturers are adopting greener production processes and offering biodegradable or recyclable components. Eco-friendly lifts also comply with global environmental standards, ensuring lower carbon footprints and reduced energy consumption. By integrating sustainable practices, these solutions not only benefit the environment but also enhance operational efficiency and cost-effectiveness. The shift toward eco-friendly lifts reflects a growing commitment to environmental responsibility and innovation in the industry.
6.4 Advanced Safety Systems
Advanced safety systems in modern lifts are transforming operational safety through cutting-edge innovations. These systems include load-sensing technologies to prevent overloading, automatic emergency braking, and real-time monitoring via IoT. Smart sensors detect potential malfunctions, enabling predictive maintenance and reducing accident risks. Additionally, advanced lifts feature enhanced emergency controls, such as one-touch stop buttons and audible alarms for immediate response. Some models incorporate collision detection and auto-leveling mechanisms to ensure stability and precision. These integrated safety solutions not only enhance user protection but also streamline operational processes, making lifts safer and more reliable for diverse applications. The focus on innovation ensures continuous improvement in lift safety standards.