mexican spirit guides
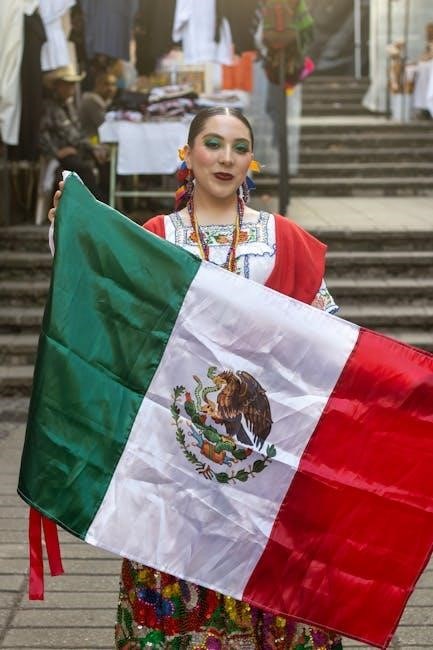
Mexican spirit guides represent a rich tapestry of Indigenous, Catholic, and folk traditions, offering profound wisdom and connection.
These guides bridge the living world with the afterlife, inspiring journeys and providing clarity through ancient practices and beliefs.
Exploring these mystical connections reveals a vibrant heritage deeply rooted in shamanism, devotion, and the honoring of ancestors.
Historical Context of Spiritual Beliefs in Mexico
Mexico’s spiritual landscape is a fascinating blend forged over millennia. Indigenous civilizations, like the Maya and Aztec, possessed complex belief systems centered on a deeply interconnected cosmos and spirit world.
Shamans and priests acted as intermediaries, communicating with deities and ancestral spirits. The arrival of Spanish Catholicism in the 16th century initiated a syncretic process, layering Catholic saints and rituals onto existing Indigenous practices.
This fusion created unique traditions, such as the veneration of La Santa Muerte and the enduring importance of Día de los Muertos, demonstrating a continuous dialogue between worlds and a persistent belief in spirit communication.
The Blend of Indigenous and Catholic Traditions
The collision of Indigenous spirituality and Catholicism in Mexico didn’t result in erasure, but a vibrant synthesis. Catholic saints were often mapped onto pre-existing deities, absorbing their attributes and roles within the spirit world.
Indigenous rituals were subtly adapted, incorporating Catholic elements while retaining their core meaning. This syncretism is particularly evident in practices surrounding death and ancestor veneration, like Día de los Muertos, where offerings blend Catholic prayers with ancient traditions.
This blending fostered a unique spiritual landscape where both Indigenous and Catholic figures can serve as spirit guides.
Understanding the Role of Spirit Guides
Spirit guides in Mexican spirituality act as intermediaries, offering support, wisdom, and protection on life’s path.
They facilitate communication between realms, aiding healing and providing guidance for personal growth and spiritual evolution.
What are Spirit Guides?
Spirit guides, within the Mexican spiritual framework, are non-physical entities that offer assistance and direction to individuals throughout their lives. They aren’t deities to be worshipped, but rather compassionate beings—sometimes ancestors, sometimes ancient energies—dedicated to supporting human evolution.
These guides communicate through intuition, dreams, signs, and synchronicities, offering insights and encouragement. Mexican shamans and curanderos actively cultivate relationships with these guides, acting as conduits for their wisdom. They are believed to be ever-present, patiently awaiting connection and offering guidance when sought.
The Purpose of Spirit Guide Connection
Connecting with Mexican spirit guides serves several vital purposes, primarily fostering personal growth and spiritual awakening. These connections illuminate life paths, offering clarity during challenging times and reinforcing one’s authentic self;
Guides assist in healing emotional wounds, understanding karmic patterns, and unlocking hidden potential. Through this guidance, individuals can navigate life with greater purpose and align with their highest destiny. Ultimately, the connection aims to restore balance and harmony within oneself and with the universe.
Types of Mexican Spirit Guides
Mexican spirit guides manifest in diverse forms, reflecting the country’s blended spiritual heritage; Kauyumari, the magical deer spirit, embodies guidance and protection. Naguals, animal spirit companions, offer unique strengths and wisdom.
Ancestral spirits provide lineage-based support, while deities and saints act as powerful intercessors. Modern brujas often work with a combination of these, alongside power animals, tailoring connections to individual needs and spiritual paths.
Key Mexican Spirit Guides and Their Symbolism
Mexican spirit guides, like Kauyumari and Naguals, possess rich symbolism. Ancestral spirits and deities offer unique guidance, bridging worlds and inspiring profound transformation.
Kauyumari: The Magical Deer Spirit
Kauyumari, revered among the Yaqui people, embodies a powerful and benevolent deer spirit. This mystical being acts as a protector and guide, leading souls through the wilderness and the afterlife.
Representing purity, grace, and connection to nature, Kauyumari is often invoked during ceremonies to ensure safe passage and spiritual clarity.
He symbolizes the hunt, but also respect for the animal kingdom, embodying a harmonious balance between humanity and the natural world. Following Kauyumari offers profound spiritual insight.
Nagual: Animal Spirit Companions
Naguals, central to Mesoamerican belief systems, are animal spirit companions deeply intertwined with a person’s destiny. More than mere totems, they represent a powerful connection to the natural world and a person’s inner self.
These spirits offer guidance, protection, and insight, often manifesting in dreams or visions.
A strong bond with one’s Nagual can unlock hidden potential and facilitate healing. Understanding your animal companion is key to navigating life’s challenges with wisdom and courage.
Ancestral Spirits: The Guidance of Forebears
Ancestral spirits hold a revered position in Mexican spirituality, acting as constant guides and protectors. Día de los Muertos exemplifies the deep respect for those who came before, believing their wisdom continues to influence the living.
Communicating with ancestors offers invaluable insight and support.
Honoring their memory through ofrendas and rituals strengthens the connection, allowing for continued guidance and blessings. Seeking their counsel is a cornerstone of Mexican spiritual practice.
Deities and Saints as Spirit Guides
Mexican spirituality beautifully blends Indigenous deities with Catholic saints, both serving as powerful spirit guides. Figures like Guadalupe and San Judas Tadeo are deeply venerated, offering protection and intercession.
These entities are approached with devotion and respect, believed to offer guidance and assistance.
Modern brujas often incorporate these figures into their practices, performing rituals and offering prayers for blessings and clarity. This syncretism highlights the unique spiritual landscape of Mexico.

Methods of Connecting with Mexican Spirit Guides
Connecting with Mexican spirit guides involves practices like meditation, dreamwork, and ceremonies guided by curanderos and shamans.
These methods facilitate communication and deepen the sacred bond with the spirit realm.
Meditation and Journeying
Meditation and journeying are foundational practices for connecting with Mexican spirit guides. Through focused intention and altered states of consciousness, individuals can access deeper realms.
These techniques, often guided by rhythmic drumming or traditional music, allow for astral travel and direct communication with spirit allies.
Shamans and experienced practitioners utilize journeying to seek guidance, healing, and insight, traversing the spiritual landscape to receive messages from the guide’s realm.
Regular practice strengthens the connection and fosters a reciprocal relationship with these powerful entities.
Dreamwork and Interpretation
Dreamwork and interpretation hold significant importance in Mexican spiritual traditions as portals to communicate with spirit guides. Dreams are viewed as sacred spaces where guides offer guidance, warnings, and prophecies.
Paying close attention to dream symbolism – animals, landscapes, and recurring themes – is crucial for deciphering messages.
Keeping a dream journal and practicing lucid dreaming can enhance recall and facilitate conscious interaction with spirit guides within the dream state.
This practice fosters deeper understanding and strengthens the connection.
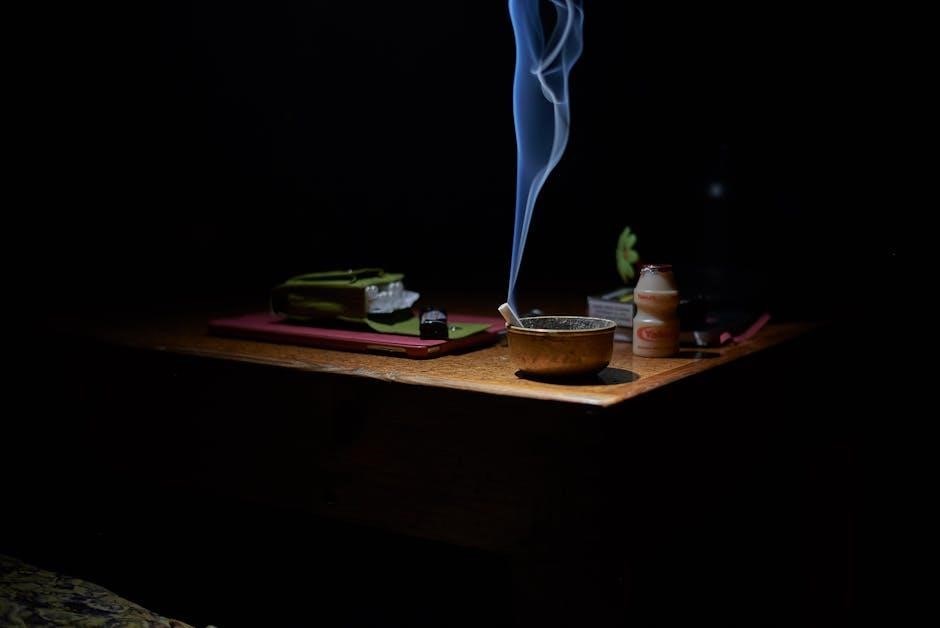
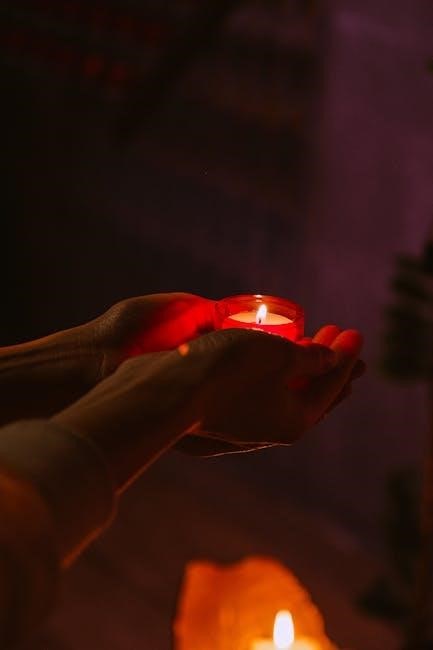
Ceremonies and Rituals
Ceremonies and rituals are central to connecting with Mexican spirit guides, acting as sacred containers for intentional communication. These practices often involve offerings – copal incense, flowers, food, or water – to honor and appease the spirits.
Traditional ceremonies, guided by curanderos or shamans, utilize drumming, chanting, and dance to induce altered states of consciousness.
Personal rituals, like creating altars or performing limpias (spiritual cleansings), can also foster connection and invite guidance from the spirit realm.
Respectful intention is key.
The Role of Curanderos and Shamans
Curanderos and shamans are vital intermediaries in the world of Mexican spirit guides, possessing deep knowledge of traditional healing and spiritual practices. They maintain strong connections with the spirit realm, acting as conduits for communication and guidance.
Through ceremonies, rituals, and plant medicine, they facilitate journeys to connect individuals with their own spirit guides and power animals.
Their expertise lies in diagnosing spiritual imbalances and offering remedies to restore harmony, often involving ancestral wisdom and energetic cleansing.
They are keepers of ancient lore.
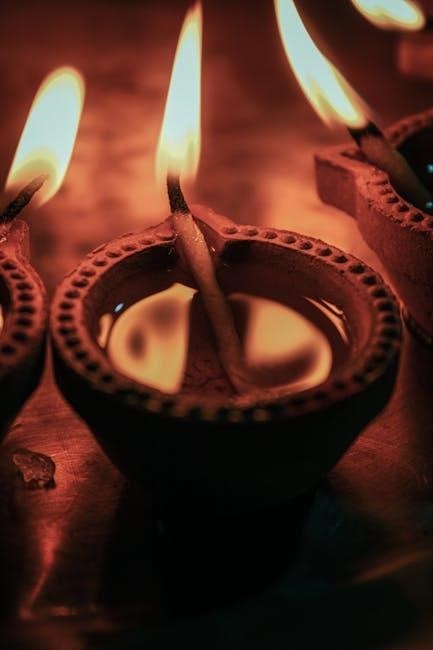
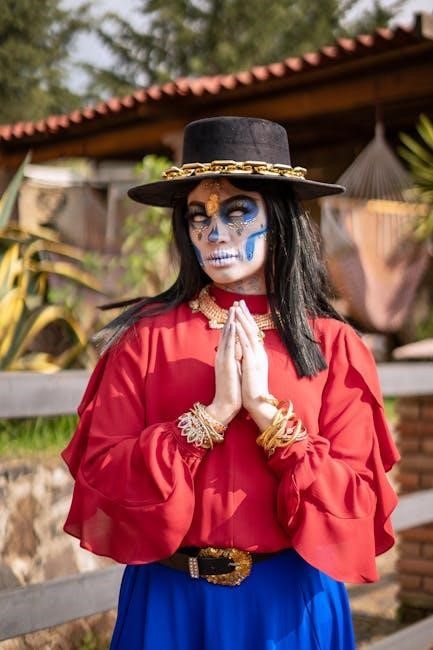
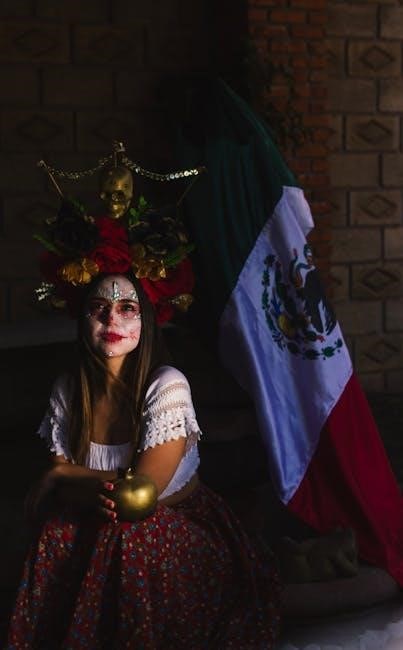
Día de los Muertos and Spirit Communication
Día de los Muertos honors ancestors, building ofrendas to welcome spirits back.
Marigolds and sugar skulls symbolize life and remembrance, fostering communication with loved ones beyond the veil.
Honoring Ancestors and Loved Ones
Día de los Muertos is fundamentally about remembering and honoring those who have passed, believing their spirits return to visit.
Families create elaborate ofrendas – altars – adorned with photos, favorite foods, and personal belongings of the deceased, inviting them home.
This isn’t a somber occasion, but a joyful celebration of life and remembrance, strengthening the bond between worlds; It’s a time for storytelling, sharing memories, and expressing love to those who continue to guide from beyond, acknowledging their enduring presence.
Building Ofrendas (Altars)
Ofrendas are meticulously constructed multi-tiered altars, representing a welcoming space for returning spirits during Día de los Muertos.
They are adorned with cempasúchil (marigolds) – their vibrant color and scent guide spirits home – alongside papel picado (cut paper banners) symbolizing the fragility of life.
Personal items, favorite foods, drinks, and calaveras de azúcar (sugar skulls) are offered as nourishment and reminders of earthly joys, creating a loving and personalized tribute to honored ancestors.
The Significance of Marigolds and Sugar Skulls
Marigolds (cempasúchil) are central to Día de los Muertos, their vibrant orange hue and potent scent believed to attract and guide spirits back to the world of the living.
Petals are often strewn in pathways leading home, creating a fragrant and visually striking welcome.
Sugar skulls (calaveras de azúcar) symbolize departed souls, often personalized with names and decorated with colorful icing, representing a sweet remembrance of loved ones and the acceptance of mortality.

The Nierika: The Spiritual Doorway
The Nierika serves as a sacred portal, connecting individuals to the four directions for receiving guidance and clarity on their life’s path.
It’s a pivotal element in Mexican spiritual traditions, facilitating communication with spirit guides.
Understanding the Four Directions
In Mexican spiritual cosmology, the four directions – North, South, East, and West – are not merely geographical points, but powerful representations of universal energies and sacred realms.
Each direction embodies specific qualities: East signifies new beginnings and illumination, South represents growth and passion, West embodies introspection and transformation, and North symbolizes wisdom and stability.
Traveling through the Nierika, one connects with these directional energies to gain insight, healing, and a deeper understanding of their personal journey, guided by spirit allies.
Receiving Clarity and Guidance
Connecting with Mexican spirit guides through the Nierika opens pathways to profound clarity and guidance for life’s challenges.
This involves cultivating a receptive state through practices like meditation and journeying, allowing intuitive messages and symbolic insights to emerge.
Spirit guides often communicate through dreams, synchronicities, and subtle feelings, offering direction and support. Trusting these inner whispers and honoring the wisdom received is key to navigating one’s path.
Modern Mexican Brujas and Spirit Work
Contemporary brujas skillfully blend tarot, divination, and spellwork with deep devotion to deities and spirit guides, honoring ancestral traditions.
They act as powerful conduits, facilitating healing and transformation through spiritual practices.
Tarot and Divination
Tarot holds a significant place in the practices of modern Mexican brujas, serving as a powerful tool for accessing guidance from spirit guides.
Beyond simply predicting the future, the cards are utilized to illuminate present energies, uncover hidden patterns, and offer insights into personal journeys.
Divination extends beyond tarot, encompassing various methods like limpia (spiritual cleansing) and readings with shells or coffee grounds, all aimed at fostering communication with the spirit realm.
These practices aren’t merely fortune-telling; they are pathways to self-discovery and a deeper understanding of one’s connection to ancestral wisdom and spiritual forces.
Spellwork and Rituals
Spellwork within the context of Mexican brujería isn’t about manipulation, but rather about harmonizing energies and manifesting desired outcomes through collaboration with spirit guides.
Rituals often involve offerings, prayers, and the use of sacred herbs and objects to create a focused intention and open a channel for spiritual assistance.
These practices are deeply rooted in Indigenous traditions and often blend with Catholic elements, creating unique and potent ceremonies.
Devotion to deities and spirit guides is central, with rituals serving as acts of reciprocity and strengthening the bond between the practitioner and the spirit world.
Devotion to Deities and Spirit Guides
Devotion forms the cornerstone of a modern Mexican bruja’s practice, fostering a reciprocal relationship with the spirit world.
This isn’t simply about asking for favors, but about honoring and nurturing the connection through consistent offerings, prayers, and respectful interaction.
Deities and spirit guides are seen as allies and teachers, offering guidance and support on the practitioner’s path.
Rituals and spellwork are often performed as acts of devotion, strengthening the bond and demonstrating gratitude for their presence and assistance.
Regional Variations in Spirit Guide Beliefs
Spirit guide beliefs differ across Mexico, with unique traditions in Mayan, Aztec, and other Indigenous cultures.
Each region boasts distinct practices and interpretations, reflecting its specific history and spiritual landscape.
Spirit Guides in Mayan Traditions
Mayan spirit guides are deeply interwoven with the cyclical nature of time and the cosmos, reflecting their advanced astronomical knowledge.
These guides often manifest as ancestral spirits or deities connected to specific days within the Tzolkin calendar, offering guidance aligned with those energies.
Shamans, or Hmen, facilitate communication through rituals, journeying, and interpreting omens, seeking wisdom for healing and community well-being.
Animal spirits, particularly jaguars and serpents, also serve as powerful protectors and guides, embodying strength and transformation.
Spirit Guides in Aztec Traditions
Aztec spirit guides were integral to a worldview centered on maintaining cosmic balance and honoring the divine forces of nature.
Naguals, animal spirit companions, played a crucial role, offering protection, power, and insight to individuals, often priests or warriors.
Deities like Quetzalcoatl and Tezcatlipoca were also approached for guidance, representing wisdom, creation, and transformation respectively.
Shamans, through rigorous training and ritual practices, accessed these spirit realms to divine the future and heal the sick.
Spirit Guides in Other Indigenous Cultures
Beyond Aztec and Mayan traditions, numerous other Indigenous cultures across Mexico possess unique spirit guide beliefs.
Otomí and Nahua communities often work with ancestral spirits and nature deities, seeking guidance in dreams and ceremonies.
Huichol (Wixárika) shamans journey to sacred landscapes to connect with powerful animal spirits and plant allies.
These diverse practices demonstrate a widespread reverence for the spirit world and the interconnectedness of all living things, offering wisdom and healing.
The Importance of Respect and Reciprocity
Genuine connection with Mexican spirit guides demands deep respect and reciprocal offerings of gratitude.
Maintaining a sacred bond requires honoring their wisdom and acknowledging their presence in your life’s journey.
Offering Gratitude to Spirit Guides
Expressing sincere gratitude is fundamental when working with Mexican spirit guides. This acknowledgment strengthens the connection and fosters continued support.
Offerings can take many forms, from ofrendas with symbolic items like marigolds and favorite foods, to dedicated prayers and mindful actions.
Simple acts of kindness, honoring ancestors, and living in alignment with their guidance are also powerful expressions of thanks. Reciprocity ensures a harmonious and mutually beneficial relationship.
Maintaining a Sacred Connection
Nurturing a consistent practice is vital for maintaining a strong bond with Mexican spirit guides. Regular meditation, dreamwork, and participation in ceremonies deepen the connection.
Creating a dedicated sacred space, perhaps an ofrenda, can serve as a focal point for communication and reverence.
Respectful intention, mindful living, and a commitment to reciprocity are essential for upholding the sanctity of this spiritual partnership, ensuring continued guidance.

Spirit Animals and Power Animals
Mexican traditions deeply value spirit and power animals as potent guides, offering healing and strength.
Identifying your animal companion unlocks unique insights and supports personal transformation through a sacred alliance.
Identifying Your Power Animal
Discovering your power animal within the Mexican spiritual framework involves attentive introspection and connection with nature.
Consider animals that repeatedly appear in your dreams, meditations, or life experiences – these are significant clues.
Pay attention to instinctive reactions; an animal’s characteristics might resonate with your own strengths or challenges.
Journeying through guided meditation, facilitated by a curandero, can also reveal your animal ally, fostering a deeper understanding of its guidance.
Working with Your Power Animal for Healing
Once identified, your power animal becomes a potent ally in the healing process, offering unique strengths and perspectives.
Invoke its energy during meditation, visualizing its presence and seeking guidance for emotional, physical, or spiritual imbalances.
Rituals honoring your animal companion, like creating an altar or offering gratitude, deepen the connection.
Through shamanic journeying, you can directly communicate with your power animal, receiving insights and support for profound transformation and well-being.

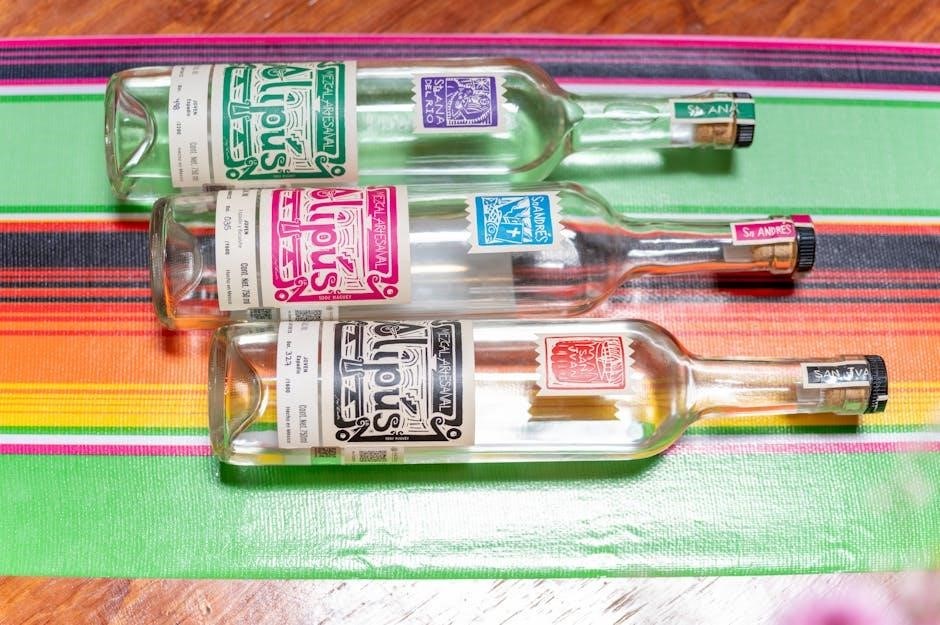
The Connection Between Food and Spirituality
Traditional Mexican cuisine isn’t merely sustenance; it’s a spiritual practice imbued with symbolism, honoring ancestors and deities through ingredients and preparation.
Each element carries meaning, fostering connection and nourishment on multiple levels.
Traditional Mexican Cuisine as a Spiritual Practice
Mexican food preparation transcends culinary skill, becoming a sacred act deeply intertwined with spirituality and honoring ancestral wisdom.
Ingredients like corn, beans, and chili peppers aren’t just flavors; they represent gifts from the gods and the earth, embodying life and sustenance.
The act of cooking, especially for Día de los Muertos, is a devotional offering, strengthening the connection between the living and the spirit world.
Each dish prepared with intention becomes a prayer, a way to nourish both body and soul, and invite blessings from spirit guides.
The Symbolism of Ingredients
Traditional Mexican ingredients carry profound symbolic weight, reflecting a deep connection to the cosmos and spirit guides.
Corn, the foundation of life, represents ancestral lineage and rebirth, while beans symbolize prosperity and grounding.
Chili peppers embody transformation and passion, and chocolate, a sacred offering, signifies love and spiritual awakening.
Marigolds, used extensively in Día de los Muertos, guide spirits home with their vibrant color and scent, fostering communication and remembrance.
Ethical Considerations When Working with Spirit Guides
Respectful engagement is crucial; avoid cultural appropriation and prioritize learning from qualified Mexican practitioners.
Honoring traditions and seeking guidance responsibly ensures a sacred and reciprocal connection with these powerful energies.
Avoiding Cultural Appropriation
Genuine respect demands careful consideration when engaging with Mexican spiritual traditions. It’s vital to understand the historical context and avoid superficial adoption of practices without proper learning.
Cultural appropriation occurs when elements are taken from a culture without understanding or honoring their original meaning. Seek knowledge directly from Indigenous or Mexican practitioners, prioritizing their voices and perspectives.
Avoid commodifying sacred practices or presenting them as your own. Instead, focus on respectful learning, reciprocity, and supporting the communities from which these traditions originate.
Seeking Guidance from Qualified Practitioners
Navigating Mexican spirit work is best done with experienced guidance. Curanderos and shamans possess deep knowledge and ethical frameworks for safe and respectful practice.
Look for practitioners with demonstrable lineage, community recognition, and a commitment to preserving traditional knowledge. Avoid those offering quick fixes or sensationalized experiences.
A qualified practitioner will prioritize your well-being, emphasize reciprocity, and help you build a genuine connection with the spirit world, grounded in respect and understanding.
Resources for Further Exploration
Delve deeper into Mexican spirituality through books on traditions and beliefs, and explore online communities for shared learning and connection.
Discover authentic insights and expand your understanding of these powerful spiritual pathways and ancient wisdom.
Books on Mexican Spirituality
Exploring literature offers a gateway to understanding Mexican spirit guides and their profound influence. Seek out texts detailing the traditions of curanderos and shamans, uncovering ancient practices.
Investigate books on Día de los Muertos to grasp the significance of ancestor veneration and spirit communication. Look for scholarly works on Mesoamerican cosmology and mythology, revealing the origins of these beliefs.
Consider titles that explore the blend of Indigenous and Catholic spiritualities, offering a holistic view of Mexican spiritual heritage and its enduring power.
Websites and Online Communities
Digital resources provide accessible avenues for learning about Mexican spirit guides and connecting with like-minded individuals. Explore websites dedicated to Mesoamerican spirituality and curanderismo, seeking authentic information.
Engage with online forums and communities focused on Mexican folklore, shamanism, and Día de los Muertos, fostering respectful dialogue and shared experiences.
Be discerning, prioritizing sources that demonstrate cultural sensitivity and a commitment to accurate representation of these sacred traditions.
Embracing the Wisdom of Mexican Spirit Guides
Mexican spirit guides offer a profound pathway to self-discovery, healing, and a deeper connection to the natural world. By honoring ancestral wisdom and embracing these mystical allies, we unlock ancient knowledge.
Respectful engagement, coupled with gratitude, strengthens this sacred bond, enriching our lives with guidance and inspiration.
Embrace the vibrant heritage and allow the wisdom of these guides to illuminate your journey, fostering a harmonious relationship with spirit.