guitar fretboard notes pdf
The guitar fretboard is the heart of the instrument, showcasing notes arranged in a specific layout. Understanding it is crucial for playing effectively. With resources like PDF diagrams, players can visualize note positions, aiding both beginners and experienced musicians in mastering the fretboard efficiently.
1.1 Definition of the Guitar Fretboard
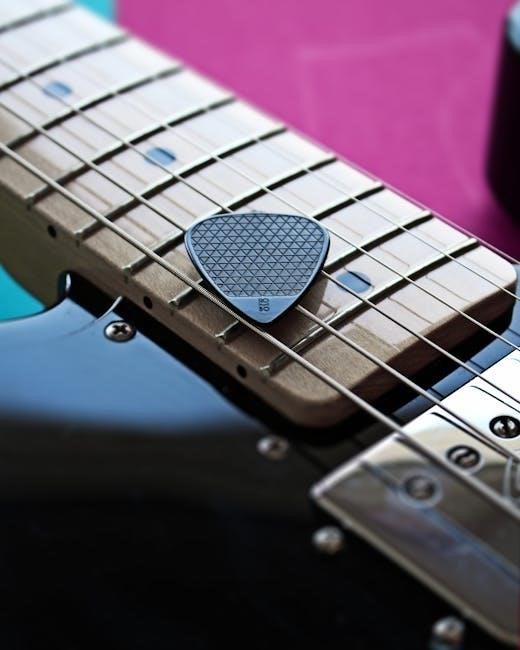
The guitar fretboard, also known as the fingerboard, is the long, flat piece of wood attached to the neck of the guitar. It is divided into frets, which are raised bars that separate the different notes. When a string is pressed down behind a fret, it shortens the vibrating length of the string, producing a specific note. The fretboard is where the player presses the strings to create different pitches, making it essential for playing chords, melodies, and solos. The layout of the fretboard is standardized, with notes repeating in octaves across the strings. Understanding the fretboard’s structure is key to navigating the instrument effectively. PDF resources, such as fretboard diagrams, provide a visual guide to the notes, helping players memorize their positions and improve their skills. These diagrams are especially useful for beginners, as they offer a clear and organized way to learn the fretboard’s complexities.
1.2 Importance of Learning the Fretboard
Mastering the guitar fretboard is essential for any aspiring guitarist, as it unlocks the ability to play with precision and confidence. Knowing the notes on the fretboard allows players to navigate the instrument intuitively, enabling them to improvise, compose, and perform complex pieces. It enhances music theory understanding, making it easier to identify chords, scales, and arpeggios. Additionally, familiarity with the fretboard improves sight-reading skills and accelerates the learning process for new songs. PDF resources, such as labeled fretboard diagrams, provide a valuable tool for memorization, offering a clear visual representation of note positions. These resources are particularly beneficial for beginners, as they simplify the learning process and build a strong foundation. By dedicating time to study the fretboard, guitarists can elevate their playing to a professional level, ensuring they have the skills needed to excel in various musical genres and styles.
1.3 Brief History of the Guitar Fretboard
The guitar fretboard has a rich history tied to the evolution of stringed instruments. Originating from ancient instruments like the lute and vihuela, the modern fretboard emerged in the 16th century. Initially, frets were made of animal gut, later replaced by metal for durability. The fretboard’s design became standardized in the 19th century, with Antonio de Torres Jurado playing a key role in modernizing the guitar. Historically, fretboards were crafted from woods like ebony or rosewood, chosen for their tonal qualities. In the 20th century, the electric guitar introduced new materials, such as maple, expanding the fretboard’s versatility. Today, the fretboard remains central to guitar playing, with its layout enabling precise note placement. Understanding its history enhances appreciation for its role in music. PDF resources now offer detailed fretboard diagrams, aiding players in mastering note positions and techniques, making learning more accessible than ever.
Understanding the Notes on the Guitar Fretboard
Mastering the guitar fretboard involves recognizing natural notes (A-G) and sharps/flats. PDF diagrams provide clear visualizations, mapping each note’s position across strings and frets. This knowledge is essential for navigation, chord formation, and seamless playing, benefiting both beginners and advanced musicians.
2.1 Basics of Guitar Notes
The guitar fretboard is composed of natural notes (A, B, C, D, E, F, G) and sharps/flats, which are variations of these notes. These notes repeat across the fretboard in a specific pattern, with each string tuned to a specific pitch. PDF diagrams provide a visual guide, mapping these notes clearly for players to understand their positions. Sharps (#) and flats (♭) are accidentals that alter the pitch of natural notes, adding versatility to the music. Understanding these basics is fundamental for navigating the fretboard effectively. By using resources like fretboard notes PDFs, musicians can gain clarity on how notes are arranged and how they relate to each other. This knowledge is essential for forming chords, scales, and melodies, making it a cornerstone of guitar playing.
The repetition of notes every 12 frets creates octaves, which are crucial for understanding harmony and pitch relationships. PDF charts often highlight these octaves, helping players recognize patterns and intervals. This foundational understanding of guitar notes is vital for both beginners and advanced players, enabling them to explore various musical styles with confidence.
2.2 String Numbering and Note Names
Guitar strings are numbered from 1 to 6, with the 1st string being the thinnest (high E) and the 6th string the thickest (low E). Each string is tuned to a specific note, and fretting a string changes its pitch. PDF diagrams often label these notes clearly, helping players identify their positions. The note names on the fretboard include natural notes (A, B, C, D, E, F, G) and their sharps or flats, which are essential for understanding music theory. These diagrams also show how notes repeat across the fretboard, creating a repeating pattern every 12 frets. By studying these resources, musicians can easily locate any note on the fretboard, enhancing their playing and composition skills. Additionally, labeled fretboard charts highlight the relationship between string numbering and note names, making it easier to navigate the instrument. This knowledge is fundamental for mastering chords, scales, and melodies, as it provides a clear visual guide to the fretboard layout.
2.3 Understanding Octaves on the Fretboard
Octaves on the guitar fretboard refer to the repetition of the same note at a higher or lower pitch. Each note repeats every 12 frets, creating a pattern that helps musicians navigate the instrument. PDF diagrams often highlight these octaves, showing how notes align across different strings and frets. This visual representation simplifies understanding the fretboard’s layout and how notes relate to each other. By identifying octaves, players can enhance their knowledge of scales, chords, and harmonies. Additionally, labeled fretboard charts in PDF format provide a clear guide to locating octaves, which is essential for advanced techniques like soloing and improvisation. Understanding octaves not only improves playing skills but also deepens the musician’s grasp of music theory and composition. With the help of these resources, guitarists can master the concept of octaves and apply it to various musical genres and styles, making their performances more versatile and sophisticated. This knowledge is a cornerstone for any serious guitarist aiming to excel in their craft.

Guitar Fretboard Notes PDF Resources
Guitar fretboard notes PDFs are essential tools for learning and mastering the fretboard. These resources provide clear, visual layouts of notes, making it easier to understand and memorize. High-quality PDFs are available for free, offering labeled and blank diagrams for practice and reference.
3.1 Benefits of Using a Fretboard Notes PDF
Using a fretboard notes PDF offers numerous benefits for guitarists. It provides a clear, visual representation of the fretboard, making it easier to identify and memorize note locations. PDFs are portable and can be accessed on various devices, allowing for convenient practice anywhere. They are particularly useful for beginners, as they help in understanding the layout of the fretboard and how notes relate to each other across different strings. Additionally, PDFs often include features like labeled diagrams, blank charts for practice, and octave visualizations, which enhance learning. Many resources are free and customizable, catering to different skill levels and tuning preferences. This versatility makes fretboard notes PDFs an invaluable tool for both learning and advancing guitar skills, ensuring efficient progress in navigating the fretboard with confidence.
3.2 How to Find High-Quality Fretboard Notes PDFs
To find high-quality fretboard notes PDFs, start by using specific search terms like “guitar fretboard notes PDF” or “high-quality fretboard diagram PDF.” Visit reputable music education websites and guitar forums where experienced players often share reliable resources. Check for reviews or recommendations from guitar communities to identify well-regarded PDFs. Look for resources that offer both labeled and blank diagrams, and ensure they cover various tunings for versatility. Consider official guitar education materials or books that include PDFs, as these are often trustworthy. Additionally, explore guitar learning apps or software that provide printable PDFs. Verify the accuracy and clarity of the PDFs before downloading, and prefer those updated regularly to ensure relevance. By following these steps, you can locate high-quality fretboard notes PDFs that enhance your learning experience.
3.3 Printable Blank and Labeled Fretboard Diagrams
Printable blank and labeled fretboard diagrams are essential tools for guitarists. These diagrams provide a visual representation of the fretboard, either with or without note labels, allowing players to study and practice effectively. Labeled diagrams are ideal for beginners, as they clearly mark each note on every string and fret, helping to build familiarity with the layout. Blank diagrams, on the other hand, are perfect for more advanced players who want to test their knowledge by filling in the notes themselves. Both types are widely available in PDF format, ensuring high-quality printing and clarity. Many resources offer customizable options, catering to different tunings such as standard, Eb, or drop tunings. These diagrams can be printed in various sizes, making them versatile for use in practice sessions, lessons, or as quick reference guides. By utilizing these printable tools, guitarists can enhance their understanding of the fretboard and improve their overall playing skills.

Memorizing the Guitar Fretboard Notes
Mastering the fretboard requires a systematic approach. PDF charts and labeled diagrams are invaluable for visual learning. Regular practice, using techniques like note repetition and interval exercises, helps build muscle memory. Consistency is key to long-term retention and fluency.
4.1 Techniques for Memorizing Fretboard Notes
Memorizing the guitar fretboard notes can be achieved through systematic and engaging techniques. One effective method is to use blank and labeled fretboard diagrams in PDF format, allowing players to test their knowledge and track progress. Another approach is to focus on intervals, identifying the relationship between notes and their positions. This helps in understanding the layout logically. Additionally, players can practice locating notes across the fretboard by starting with one string and gradually expanding to others. Using octaves is another powerful technique, as it reinforces note locations across different strings. Printable PDF charts provide a visual aid, enabling musicians to study and practice anywhere. Apps and tools can also supplement learning by offering interactive exercises. Consistent practice, even for short durations, is essential for building long-term memory. By combining these methods, guitarists can develop a deep understanding of the fretboard, enhancing their overall playing ability.
4.2 Using PDF Charts for Effective Learning
PDF charts are a valuable resource for mastering the guitar fretboard, offering a clear and structured way to learn note positions. Labeled fretboard diagrams provide a visual guide, helping players identify notes across all strings and frets. Blank PDF charts allow for interactive learning, enabling musicians to test their knowledge and fill in notes as they progress. These charts are particularly useful for understanding octaves and the relationship between strings. Printable PDFs offer portability, making it easy to practice anywhere without relying on digital devices. Many PDF resources include diagrams for different tunings, catering to a variety of playing styles. Additionally, these charts often align notes with musical staffs, bridging the gap between theory and practical application. By using high-quality PDF charts, guitarists can develop a strong foundation, making the learning process both efficient and enjoyable. These tools are essential for anyone aiming to navigate the fretboard with confidence and precision.
4.3 Tools and Apps to Supplement Fretboard Learning
Supplementing your fretboard learning with specialized tools and apps can significantly enhance your progress. Apps like Fender Play and Guitar Tricks offer interactive lessons and exercises tailored to fretboard mastery. Yousician uses gamification to make learning engaging and fun. Additionally, apps such as Fretboard Hero and Guitar Notes provide interactive fretboard diagrams, allowing you to explore notes in real-time. These tools often include quizzes, games, and progress tracking to keep you motivated. Some apps even offer customizable exercises based on your skill level and goals. Desktop software like Guitar Pro and Transcribe! can also be invaluable, offering advanced features for composers and players aiming to deepen their understanding. By combining these tools with PDF charts, you can create a comprehensive learning system that suits your style and preferences, ensuring efficient and enjoyable fretboard mastery.


Practical Applications of Fretboard Knowledge
Mastery of the fretboard opens doors to advanced techniques like improvisation, soloing, and composition. It enhances music theory understanding and allows seamless navigation across the neck, making playing more intuitive and versatile for guitarists of all levels.
5.1 Music Theory and the Fretboard
Understanding music theory in relation to the fretboard is essential for mastering the guitar. The fretboard layout reflects the sequence of musical notes, with each string representing a specific pitch. By studying the fretboard, players can visualize scales, intervals, and chord structures, enhancing their ability to apply music theory concepts. Knowledge of note positions aids in identifying keys, modes, and harmonies. For instance, the major scale can be mapped across the fretboard, revealing patterns that simplify improvisation. Additionally, recognizing sharps and flats, such as F, C, G, D, A, E, B, and their flat counterparts, becomes intuitive. This integration of theory and fretboard awareness allows guitarists to navigate the neck with precision, making complex techniques like soloing and composition more accessible. PDF diagrams further support this learning by providing a clear, visual guide to note relationships and their theoretical foundations, empowering musicians to explore and create with confidence.

5.2 Improvisation and Soloing Using Fretboard Notes
Mastery of the fretboard notes is a cornerstone of effective improvisation and soloing. By understanding the layout of notes, guitarists can navigate the neck intuitively, creating melodic and harmonic phrases with precision. Knowing the positions of notes enables players to visualize scales, arpeggios, and intervals, making it easier to craft solos that align with the song’s key. For example, recognizing the C major scale across the fretboard allows for seamless transitions between octaves, enhancing the fluidity of improvisation. Additionally, awareness of sharps and flats, such as F, C, G, D, A, E, B, and their flat counterparts, helps musicians incorporate complex harmonies into their solos. PDF diagrams serve as invaluable tools, providing clear visual guides to note relationships and patterns. This knowledge empowers guitarists to experiment confidently, blending creativity with technical skill to produce compelling and emotionally resonant solos. The fretboard becomes not just a tool but a canvas for musical expression, where every note tells a story.
5.3 Songwriting and Composition with Fretboard Awareness
Fretboard awareness is a powerful tool for songwriting and composition, enabling guitarists to craft harmonically rich and melodically engaging music. By understanding the layout of notes, intervals, and scales, writers can create chord progressions and melodies that resonate deeply. Knowledge of the fretboard allows for the identification of key centers, enabling the use of diatonic and non-diatonic elements to add complexity. For instance, recognizing the C major scale across the fretboard simplifies the creation of chord voicings and arpeggios. Additionally, awareness of octaves and note relationships helps in developing layered harmonies. PDF diagrams provide visual aids to map out these elements, facilitating the composition process. This awareness also enhances the ability to experiment with chord substitutions and modal interchange, adding depth to compositions. Moreover, fretboard visualization can inspire creative melodies and riffs, making the instrument a versatile tool for songwriting. Ultimately, fretboard awareness transforms the guitar into a compositional canvas, where every note contributes to the narrative of the music.

Additional Tools and Resources
Beyond PDFs, guitarists can utilize tools like virtual assistants, smart notifications, and customizable widgets for efficient learning. Printable blank diagrams and interactive fretboard apps offer further customization, enhancing study and practice sessions with advanced features tailored to individual needs.
6.1 Guitar Tab Sheets and Fretboard Visualization
Guitar tab sheets and fretboard visualization tools are essential resources for learning and mastering the guitar fretboard. These tools provide a clear, visual representation of notes and their positions, aligning with music stave notation for better understanding. Free, printable blank guitar tab sheets and fretboard diagrams are widely available, offering musicians a structured way to practice and map out songs. Fretboard visualization charts, often included in PDF formats, help players identify note locations across the neck, making it easier to navigate during performances or compositions. These resources are particularly useful for beginners, as they offer a hands-on approach to learning the layout of the fretboard. Additionally, they can be customized to focus on specific tunings or scales, catering to both intermediate and advanced players. By combining tab sheets with fretboard diagrams, guitarists can enhance their practice routines, improve songwriting, and refine their solos with precision and clarity. These tools bridge the gap between theoretical knowledge and practical application, making them indispensable for any guitarist aiming to elevate their skills.
6.2 Fretboard Diagrams in Different Tunings
Fretboard diagrams tailored to various tunings are invaluable for guitarists exploring diverse musical styles. Standard tuning diagrams are widely available, but resources also cater to alternate tunings like drop-D, open-D, and Eb-Standard. These diagrams provide a visual guide to note positions, helping players adapt to different tunings seamlessly. For example, a PDF diagram in Eb-Standard tuning highlights the unique note layout, essential for musicians playing in alternate tunings. Additionally, these diagrams often align notes with music stave notation, enhancing understanding of pitch placement. Customizable fretboard charts allow players to focus on specific tunings, making practice more efficient. Whether for songwriting, improvisation, or mastering complex techniques, fretboard diagrams in different tunings offer a flexible learning tool. They are particularly beneficial for intermediate players seeking to expand their musical range and for advanced musicians experimenting with unique sounds. These resources ensure that guitarists can navigate any tuning with confidence and clarity, enriching their musical versatility and creativity.
6.3 Customizable Fretboard Charts for Advanced Players

Customizable fretboard charts are a powerful tool for advanced guitarists, offering tailored layouts to suit specific needs. These charts allow players to focus on particular scales, modes, or tunings, enhancing their practice sessions. With features like virtual assistants and smart notifications, customizable diagrams provide a modern approach to fretboard mastery. Advanced players can use these charts to explore complex techniques, such as alternate tunings or intricate note patterns. For instance, a customizable chart in Eb-Standard tuning can highlight the unique note positions, aiding musicians in adapting to less common tunings. Additionally, these charts often include detailed annotations, such as note relationships and interval structures, which are crucial for advanced musical composition and improvisation. Many PDF resources also offer supplementary tools, like interactive apps, to further enhance learning. By leveraging customizable fretboard charts, advanced players can refine their skills, experiment with new sounds, and deepen their understanding of the instrument. These resources are indispensable for musicians aiming to push their creativity and technical proficiency to the next level.